To summarize the article on equipment, you'll want a camera that gives you acceptable quality at the high ISO speeds you will often be needing, and a lens or lenses with a relatively wide maximum aperture (f/2.8 or better, ideally) in a focal length range that provides the sort of field of view that works for you. For me, that means a DSLR (Pentax K200D) and lenses in the short to medium telephoto lengths. 100mm is the sweet spot for me on APS-C, although I know others prefer wider angles, and longer is useful if you can't shoot from as close to the action as you otherwise might. Although I mostly use primes, I think a 50-135mm zoom would be ideal for most people.
Pretty much any camera that satisfies these basic requirements - good high ISO performance, wide aperture lens - should also give you control over ISO, shutter speed, and aperture. It doesn't really matter whether this is done via a completely manual mode, or via the use of aperture priority or shutter priority modes combined with exposure compensation, exposure lock, or other manual overrides. Basically, any DSLR should do the job, but a film camera or full featured fixed lens camera that provides this same type of capability would be fine too.
Before we go further, I should point out that my main musical interest is jazz, and that affects my photography in some significant ways. For one thing, it means my photographs tend to be more about individuals than the the "band", because such is often the nature of jazz. It means that my subjects are often playing wind instruments, which have their own set of issues regarding focal length choice, composition, and focus. It means I am often working in small clubs with very simple but very poor lighting - not the type of elaborate lighting displays typical with some rock bands. And the listening environment is often pretty quiet compared to typical rock shows. So if some of my comments seem strange to you - like if you cannot possibly imagine anyone caring about the sound of a DSLR shutter - then feel free to take those with a grain of salt. Still, I expect most of what I have to say will be relevant to anyone who has stumbled upon this article.
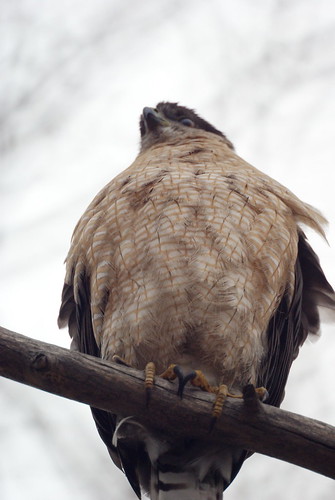
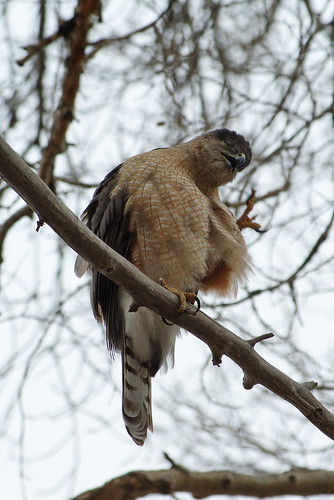
Here's an example of the kind of photograph I like to take:

Even if you have a different creative vision than I do, you may still find my technical commentary useful.
Basic Settings
Beginners are often bewildered by the various settings on their cameras. I can cut through some of that by telling you there are only three that really matter - ISO, aperture, and shutter speed. These are the basics of exposure and have been since the dawn of photography. If your camera provides controls over sharpness, contrast, saturation, and so forth, that's fine, and feel free to mess with them if you like. But none of those things make a fundamental difference to the image in the same way the basic exposure settings do. And especially if you shoot RAW - more on that in a moment - you will find that the exposure settings are the only things that are fixed when you take the picture. All else can be changed later.
I personally use "M" (manual) mode to control my exposure. I did this at first because with my old manual lenses, it is the only way exposure can be controlled. But I soon realized I liked the control it gave, and I found I would get more consistent results that way too, so now I use it all the time even with my modern lenses. The optimum exposure doesn't vary from shot to shot nearly as much as an autoexposure system will tend to think. Consider a person wearing light colored clothing in a spotlight standing against a dark colored background in the shadow (a typical situation). As long as the person doesn't change their clothes or move out of the spotlight, there is no reason for exposure to change. But an autoexposure system can easily be fooled by such irrelevant factors as how much of the dark background is visible in the shot, whether the lighting on the background changes, whether a second person enters the shot, whether an instrument or microphone happens to catch a reflection from the spotlight, whether the spotlight itself is in the picture, etc.
Also, the autoexposure system often recommends a shutter speed that is too slow to stop camera shake or subject motion. In low light concert photography, you often need to be prepared to underexpose in order to get a sharp pictures, and then expect to improve the exposure in post processing (PP). You will probably be needing to override the default suggested exposure more often than you think. So some amount of manual override is often necessary no matter what mode you shoot in.
On the other hand, if you are not used to shooting in "M" mode, it can be daunting at first, and you are indeed likely to blow some shots until you get the hang of it. Stage lighting often varies in color from one part of the stage to another, and sometimes in intensity as well. An exposure that works for one musician in one area of the stage might work another musician in another area of the stage, but it might not. It will be up to you to monitor changes in lighting across the stage, and also over time - systems that change the lighting every couple of minutes are common in some venues.
So anyhow, as I see it, you have two choice: use "M" mode and watch for changes in lighting, or use an auto mode and watch for everything else. Your call. If you use an autoexposure mode, you need to either make liberal use of your exposure-lock control or expect to be constantly adjusting exposure compensation based on your read of the scene. Otherwise your exposures may vary wildly for no good reason, even when shooting what seems to be the same scene, and some will be blurry from too slow a shutter speed.
I'll deal with the specifics of setting exposure later. For now, I want to run down the other camera settings you can make before you start shooting and mostly leave alone.
First, as I alluded to before, you'll want to shoot RAW. Whatever you might think about doing PP, it's almost always going to help a lot in concert photography, and need not be particularly time consuming in order to be useful. Batch setting white balance, noise reduction, and perhaps a global exposure adjustment can be done in seconds for an entire cardful images, and will turn a set underexposed, noisy, orange-colored images into something you can really be happy with. There are programs that try to provide this same level convenience to JPEG, but the very nature of JPEG is such that you will not be able to maintain the same quality when doing these sorts of adjustments. If you insist on shooting JPEG anyhow, be my guest, but expect to never be able to get rid of of the stage lighting color casts, and expect any shots you underexpose in order to get a fast enough shutter speed to never look anywhere near as good in terms of detail or noise as it could - it is just not possible to PP that type of JPEG image to the same extent as with RAW.
If your camera or lens features some form of stabilization (IS, VR, SR, OS, AS, or whatever the manufacturer of your gear calls it), turn it on unless you are using a tripod and the manufacturer recommends it not be used with a tripod. Most stabilization systems work fine with a monopod. If you don't have stabilization, a monopod is a cheap way and relatively unobtrusive to improve stability.
If your camera gives you a way to quickly switch between auto and manual focus, find it and learn to use it. Pentax DSLR's have a button that can temporarily disable AF while pressed without needing to actually switch to MF mode; I find that incredibly useful. Others like to set up their cameras so that pressing the shutter does not perform AF at all, but instead a button press does. That's an option too. What we're looking for here is a way to achieve focus on a subject, then make sure the camera doesn't refocus while you fire off a string of shots of that subject.
If your camera requires you to do something special to turn off flash, do that now. If you plan to shoot with flash, you can safely skip the section on exposure, because it won't be relevant. You'll have to turn elsewhere for help with flash exposure. But do make sure you know flash is acceptable before assuming you'll be using it. As a musician myself, I can tell you it's never acceptable during my performances, but that's my world. Yours may be different.
Although ISO is one of the three exposure parameters that in theory might vary from shot to shot, in practice, light levels are often low enough that you'll just want to set it as high as you stand (in terms of noise) before you start shooting and not mess with it again all night. I shoot at ISO 1600 practically all the time in my concert photography.
Positioning And Composition
Once your camera is set up, your next step is to position yourself and frame your shots to get the results you want. This is the part that is the most personal, so my advice here will be pretty general.
In general, the closer you are, the better. You'll be able to capture more detail, you'll have more dramatic perspective and depth of field effects, and it will be easier to position yourself to avoid obstructions. You'll also be less intrusive to fellow attendees if you are between them and the band than if you are continually pushing through the crowd. Although you do want to be respectful and not stand directly in someone else's line of sight for long. Nor do you want to be so close you are distracting to the musicians. But shots like this can't be taken from further back:

If you are close and you want a shot of the whole band, you'll need a wide angle lens, and if you don't have anything suitable, standing further back will have to do. Sometimes the only convenient spots to be near the stage don't allow for unobstructed views of all the band members, so some shots might have to be taken from further away with a longer lens. This is obviously very specific to the venue and band. Depending on the arrangement of the musicians and where you position yourself, you might be able to capture shots of the whole band from surprisingly close with a 50mm lens, or even 70mm, as I did here:

While occasionally it works out that you can get all the shots you want from one position, more often than not you'll be better off moving around. To minimize disruption, it is usually best to do all the shooting you need to do from one spot (including lenses changes as necessary), then move to another spot, rather than constantly flitting around. On the other hand, you may also want to minimize lens changes, and that might suggest taking all shots you think you will want with one lens, moving around as necessary, then change lenses and repeat.
Because my main musical interest is jazz, and jazz is so much about personal expression, I tend to be primarily interested in capturing images of individual musicians more so than shots of the entire band. I usually take one or two band shots just to have them, but I mostly focus on more intimate portrait-like shots, as you can see from the examples I am including. Because so much jazz involves wind instruments in the front, and piano, guitar, bass, and drums further back, I can often use a longer telephoto lens and still incorporate the whole instrument than I could if I were mostly shooting guitar players in the front line. But all this varies according to the specific band and how they are set up on stage. One of the things I do in planning my shots is think about what focal lengths I will need to capture head-and-instrument portraits of each musician from a variety of different vantage points.
Obviously, you will never be able to completely anticipate every shot you might want. You will likely find that moving around suggests shot to you that you might not have thought of otherwise. But if you try to keep these ideas in mind, things usually go smoother. Here's a shot I had not planned to take, but once I arrived in the spot where I was planning to shoot the pianist, I saw an opportunity to shoot the whole rhythm section:

Any shot you can take while leaning against a wall, or post, or other support - or seated - is likely to come out sharper than any shot you take while standing unsupported. Camera/lens stabilization and monopods can help, but still, the steadier you are yourself, the better.
All basic compositional concepts you might learn about in any book on photography technique - or drawing or painting, for that matter - apply. However, given that you should be expecting to post process your shots to some extent, and that can include cropping, it might not be worth obsessing too much about composition while shooting. But there are some things that you are much better off paying attention to now than trying to deal with later. When lining up a shot, try to be aware of things that are in the frame but might turn out to be unnecessary or distracting, such as overly busy backgrounds, objects or people in the background that appear growing out of your subject's head, etc. When shooting singers using microphones or people playing wind instruments, it is often best to shoot from an angle to either side so that you can still see most of the face:

On the other hand, sometimes with a wind instrument especially, the "coming right at you" look can be quite effective too, even if it partially obscures the face:

I also like to be on the lookout for interesting geometric shapes formed by the musicians, their instruments, and whatever else is in the frame, to create the occasional semi-abstract shot. I don't know or care if anyone else would find this shot interesting, but I do, and that's all that matters to me:

For maximum impact, try to get the most contrast you can between the subject and the background - usually a light figure against a dark background. Even "black" skin in a spotlight will often be lighter than an unlit background:

Of course, a darker figure against a lighter background will "pop" just as well, and that can happen at times even with "white" skin if the lighting is right:

Watch your subject for motions that keep repeating and see if you can identify a spot in the cycle where the subject is holding a pose for a moment - that will allow you to shoot with a relatively slow shutter speed and still get a reasonably sharp picture. For example, for anyone who rocks back and forth, there is always a point of zero motion at either end of the "rock". On the other hand, shots of musicians engaged in an action that cannot be stopped at the kind of shutter speeds you will be using can be effective too - nothing says motion and excitement like a little subject blur. Particularly if parts of the subject are in motion but parts are not. I usually strive to freeze the face but show motion in the limbs, at least for instrumentalists:

One more word about the sort of portrait-like shots I usually take. I tend to go for shots showing moments of intensity, often featuring almost pained looks on the faces of the musicians:

These seldom turn out to be the musicians' favorite pictures of themselves. So I do try to capture them smiling or otherwise looking as they might like to see themselves:

Exposure
Once you've settled on a basic location and composition for a series of shots, you need to set exposure before you can actually shoot. Yes, I know - your camera has autoexposure, and in other settings it works just fine to just point and shoot and let the camera take care of the rest. But for various reasons that I alluded to above, this doesn't usually work so well for concert photography. I will be more specific about this now.
When shooting a single lit figure against a dark background - something very common in concert photography - a camera autoexposure system will typically try to exposure the background to "medium" brightness, like an 18% gray card. This will virtually always result in an overexposed figure, and depending on your aperture and ISO, probably too slow a shutter speed to stop blur. You want to expose for the figure in the light, not the dark background. Here is an example where the dark background would have led the camera to suggest a shutter speed that was unusably slow, yielding a blurry subject and blown out detail in places, and it would have ruined the effect of the dark background as well. If you think the cord growing out of the keyboardist's back is distracting now, imagine how it would looked if the background were a stop brighter:

Conversely, if there is a bright light in the picture frame, most cameras will underexpose the shot in order to avoid blowing out that light and to keep the average brightness of the scene down. This picture would have come out almost completely black except for the spotlight if I had just blindly accepted the exposure suggested by the camera:

To some extent, overexposure and underexposure can be dealt with in PP, but best results are always obtained when you get thing as close as practical in camera. The trick is in learning how to do this efficiently.
Instead of letting the camera choose an exposure based on the whole scene and then trying to figure out how much adjustment might be necessary and in which direction, I usually find it more effective to use substitute metering - setting exposure based on a scene that is dominated by the kind of lighting I want to expose for. Spot metering can be useful for this, although I actually prefer center-weighted. Either way, you can point directly at your subject and zoom in to center the meter on him or her, then set and lock the exposure using the exposure lock control or simply by being in manual exposure mode. Or you can use a spot on the floor or wall that is in the same light as your subject if that works out better. Once you have set the exposure in this way, you can shoot any composition you want containing that subject with confidence that your subject will remain consistently exposed regardless of how the rest of the scene changes from shot to shot.
For example, the camera-suggested exposure in the following shot would have been far too low because the spotlight in the frame would have fooled the meter. The singer would have lost in the shadow:

But the following shot, taken moments later, would have been overexposed because the spotlight was not in the shot, so the dark background would have fooled the meter instead:

By carefully metering on the singer himself in the shoot, and then leaving that exposure alone while shooting, I was able to capture both scenes as I wanted them, without having to dial in different amounts and types of exposure compensation throughout the series. The same exposure worked for all shots of that subject form that vantage point, and that is going to be true more often than not.
As I mentioned before, I use manual mode more or less exclusively. Pentax cameras provide a button that quickly sets what it thinks is an appropriate shutter speed while I am pointed at my chosen metering target, so I can still take advantage of the camera's metering system, and I can then adjust that suggested exposure as necessary to get the subject as bright as I want. Once set, I can and do simply leave exposure alone until the lighting changes or my attention turns to a subject in different lighting.
Even when using substitute metering techniques, you might still need to use compensation at times, however. For instance, positive compensation is often needed for subjects under bright spotlights or else the camera will try to expose to make your subject look only medium bright instead of looking like he or she is in a spotlight. Or, if you are deliberately trying to create a silhouette against a light background, negative compensation might be necessary if metering off the subject. Also, shots taken under strongly colored lighting are likely to cause one color channel of the camera to "clip" - and therefore lose detail - long before the picture looks overexposed as a whole. So you often need to underexpose in strongly colored light. For these reasons and others, compensation can still be necessary. But it is much easier to adjust based on your subject and how you want it to appear, rather than trying to figure out how to adjust an exposure your camera is making based largely on one aspect of a scene (like a dark background or a spotlight) in order to make a totally unrelated aspect of the scene (like your subject) come out the way you want.
I should note that in practice, I actually don't bother going through all of this very often. At some venues where I shoot regularly, I know before I arrive what exposure settings with work. ISO 1600, f/2.8, and 1/45" is so typical at one venue, for instance, that I can set that before leaving my house and never revisit it. Usually, when I first begin shooting at a venue I will take test shots of different spots on the stage to see if exposure needs to be adjusted up or down from one spot to the next because of the arrangement of lights. I then memorize the shutter speeds that worked: 1/45" when shooting most of the musicians but 1/30" for the drummer and 1/60" for anyone at the front microphone, for instance. Again, using manual mode makes it simple to actually get the camera to use the settings I want, as long as I remember to change shutter speeds when appropriate.
You might find that your favorite venue lets you be similarly consistent about exposure. If it is especially well lit, you might not need ISO 1600 or f/2.8, or you might be able to get a faster shutter speed. If it is not as well lit, you might need to increase ISO further if your camera allows, or use a larger aperture if your lens allows. Or, you might just settle for an underexposed picture in order to keep shutter speeds high enough, and hope to be able to correct this in PP. I routinely shoot a little underexposed at ISO 1600 and push exposure up to a stop or so in PP - giving me the equivalent of ISO 3200 - and still get acceptable (to me) results in terms of noise. That depends on your camera and your standards. But if you're thinking that you'll be able to shoot with a typical f/4-5.6 zoom at ISO 200, you are likely to be extremely disappointed.
In case you are unclear on the tradeoffs between ISO, apeture, and shutter speed, you might want to read up more on exposure elsewhere. What I'll say here is this: higher ISO means more noise (graininess); larger aperture - represented by smaller f-numbers - means shallower depth of field (DOF) which can make getting your subject in focus more difficult; slower shutter speed means blur from camera shake or subject motion. Expect to need ISO around 1600 and aperture around f/2.8 in order to get a shutter speed fast enough to combat blur. The faster the shutter speed the better, so even if I have the luxury of having enough light to not need ISO 1600 or f/2.8, I'll often leave ISO and aperture there just to take advantage of faster shutter speeds. But if your camera or lens does not perform well enough for you at those settings, by all means, decrease ISO or stop down the lens when you can do so without introducing too much blur.
I find 1/30" a good benchmark for controlling blur from subject motion if my timing is good, and it's fast enough that between the stabilization technology built in to my camera and taking advantage of whatever physical aids I can (walls, posts, chairs, etc), I don't have to worry too much about blur from camera shake even when using my 135mm lens. Of course, 1/30" won't stop a subject in active motion, but as I said, if my timing is good, I can expect a high percentage of reasonably sharp pictures.
If necessary, I'll shoot slower, but I expect to need to take more shots in order to get lucky enough to have one come out acceptably sharp. I've occasionally resorted to speeds as slow as 1/6" and managed to get good results, but that's not something one can count on. Here's one where I got lucky at that speed:

At 1/120", unless you are shooting at long telephoto lengths (200mm or beyond on APS-C) or not supporting yourself and the camera at all, you can reasonably expect most shots to come out sharp. Some musicians I find notoriously difficult to get sharp pictures of because the move so much, but if I can get them in a situation where I can use 1/120" or faster, I can usually nail them. So although f/2.8 is usually adequate for me, I am happy to have a 50mm lens at f/1.7 to help me get those those kinds of shutter speeds when I really need them:

Most of your shots will probably end up between these extremes, so your success will come down to your timing and ability to stabilize yourself and the camera/lens.
Focusing And Shooting
Focus similarly can be done using a combination of automatic and manual techniques. The main problem with simply pointing and shooting is that often, the camera will notice a microphone or instrument and focus on it instead of the musicians' face. This is of course most likely not what you want. Also, AF tends to be slow on many cameras in low light, and erratic in highly colored stage lighting, causing you to miss more shots than you might like. Plus, when taking multiple shots in a row of the same subject - something you should be in the habit of doing in order to increase your chances of at least one coming out blur-free - you don't want the camera stopping to refocus (and possibly getting it wrong) between shots. So just as with exposure, you will often want to set focus once, then shoot a whole series.
The specific of how to do this vary with camera brands and models, which is why I suggested looking into this when initially setting up your camera. As I mentioned, I have mine set up so that a button on the back of the camera temporarily disables AF. I'll half press the shutter to perform an initial focus, and if I judge that the camera was successful, I will then park my thumb on the AF cancel button while I snap as many shots as I want. Others will use a button to focus and have their cameras set so that pressing the shutter does not refocus, which accomplishes the same goal: focus once, shoot as often as you like.
That initial focus, of course, is very important. Many of my favorite concert lenses are manual focus only. That takes practice, but I am pretty good at it by now. When using an autofocus lens, I will usually let the camera try, but knowing that it might miss, I rarely accept its focus without verifying it for myself in the viewfinder. Most modern Pentax lenses allow you to override focus manually after AF lock has been achieved, without having to turn off AF, and I use this facility quite often. So even if you mostly use AF, having good MF skills can help a lot.
Psychologically, many of us have a tendency to make the same mistake the camera does: to focus on a microphone or instrument in front of the subject rather than the subject himself. You have to be very careful not to allow the camera to do this when using AF, and also not to do this yourself when using MF. Here's a shot where an AF system might have been fooled, but focusing manually I was able to get what I wanted:

I will often take a test shot and examine the results on the LCD at high magnification. Only after convincing myself that focus is good will I take more shots. I might do this several times before being satisfied. Luckily, musicians usually tend to stay in one spot long enough - or at least return to one spot often enough - to make this feasible. In that sense, it is easier than most sports. So by all means, check images and/or histograms on your LCD periodically to make sure you are getting the shots you think you are in terms of exposure and expression as well as focus. But be aware that depending on the setting, the bright light from the LCD might be distracting.
Speaking of distractions: for all their other advantages, DSLR's have a reputation for loud shutters (and Pentax DSLR's especially so). Even the quietest DSLR makes more noise than is normally acceptable during a quiet classical concert. I try to time my shots to occur during moments when it is not likely to be bothersome. For some concerts, that means I can shoot whenever I want, of course. For others, it means avoiding shooting during certain tunes only. For others, it means waiting for the loudest passages, or perhaps only when the applause starts at the end of a piece (but hopefully before musicians have put their instruments down).
I've given my opinion on flash elsewhere, but again for the record: don't use it unless you know for a fact it won't be disruptive. And I don't know about any other musicians, but from my own perspective, I can tell you it's always disruptive to me. If you do shoot in a situation where it is acceptable and you don't think the light from the flash will ruin the mood of the shot, that does of course change everything regarding exposure, but you'll have to turn elsewhere for advice on that - it's just not my thing.
One final note: I usually shoot with some sort of objective in mind. For instance, to capture at least one good shot of every musician, to capture different group poses that seem representative of the band as a whole, to capture of a shot of someone playing a specific instrument that I have not captured them using before, and so forth. When I think I have shot enough, I usually put my camera away and go back to just listening. This frees up space for other photographers if I am in the front, but it also allows me to enjoy the music more - which is, after all, presumably related to why we shoot concerts in the first place.